# Building a Vulnerable Active Directory Lab: A Practical Approach
## Intro and Purposes
Even before activating the lab access provided with my certification voucher, I decided to set up a homemade Active Directory (AD) lab. Why? Because I firmly believe that building and configuring a lab from scratch is the best way to deeply understand and learn AD concepts. The effort and time invested in this process may seem daunting initially, but it is, in fact, time saved in the long run. By going through the hands-on process of creating and troubleshooting a lab, you not only gain technical skills but also develop an intuitive understanding of how AD environments function and how they can break.
This decision was also inspired by my fascination with the elegant misconfigurations demonstrated during my studies for the [CRTP](https://dev-angelist.gitbook.io/crtp-notes) (Certified Red Team Professional). The real-world scenarios presented by Nikhil Mittal showcased just how easy it can be to implement insecure settings without realizing their potential consequences. I wanted to see for myself: how common are these misconfigurations, and how realistic is it to replicate them in a controlled environment?
Setting up a custom AD lab offers more than just preparation for certifications. Active Directory is used by over 95% of businesses worldwide, making it an essential tool in any pentester's or blue team's arsenal. Understanding how to build AD environments, how their components fit together, and how to exploit their vulnerabilities is crucial for anyone working in cybersecurity.
In this guide, we’ll walk through creating a basic, vulnerable AD lab that you can expand upon with additional services, users, and misconfigurations. This foundation will not only prepare you for certifications but will also serve as a sandbox for honing your skills.
### Main Resources
* [Active Directory - Main Concepts](https://dev-angelist.gitbook.io/home/offensive-security/active-directory-ad)
* [Certified Red Team Professiona (CRTP) - Notes](https://dev-angelist.gitbook.io/crtp-notes)
* [The Cyber Mentor's Home Lab Setup](https://www.youtube.com)
* [AD Home Lab Setup by John Hammond](https://www.youtube.com/watch?v=pKtDQtsubio\&list=PL1H1sBF1VAKVoU6Q2u7BBGPsnkn-rajlp)
* [ADSecurity.org](https://adsecurity.org/)
* [Hexdump AD Exploitation](https://www.youtube.com/watch?v=4Oc8b3nRm2I\&list=PLJnLaWkc9xRi71Pso26JlvyBkLUOETLjn)
* [Hausec's Red/Blue Team Labs](https://hausec.com)
## What You'll Need
To create your lab, you'll need a few key downloads and tools:
### Virtualization Software
You'll need virtualization software to set up and manage your lab. Options include:
* [Oracle Virtual Box](https://www.virtualbox.org/wiki/Downloads)
* [VMWare](https://www.vmware.com/products/desktop-hypervisor/workstation-and-fusion)
* [QuickEmu (Tutorial)](https://dev-angelist.gitbook.io/quickemu)
* similar tools, cloud, docker, etc
#### Networking Tools (Optional)
While not strictly necessary for this guide, having tools like Wireshark or Burp Suite ready can enhance your exploration of network traffic and vulnerabilities.
### Operating Systems
* Attacker Machine \*nix like machine (Kali Linux, ParrotOS, Debian, Arch, etc) - **Optional, Needed only for attack**
* Windows Server 2016/19/22/25\~ (1 or more)
* Windows 7/10/11\~ Enterprise edition (1 or more)
## My Setup
In my case I decided to use the following three OS:
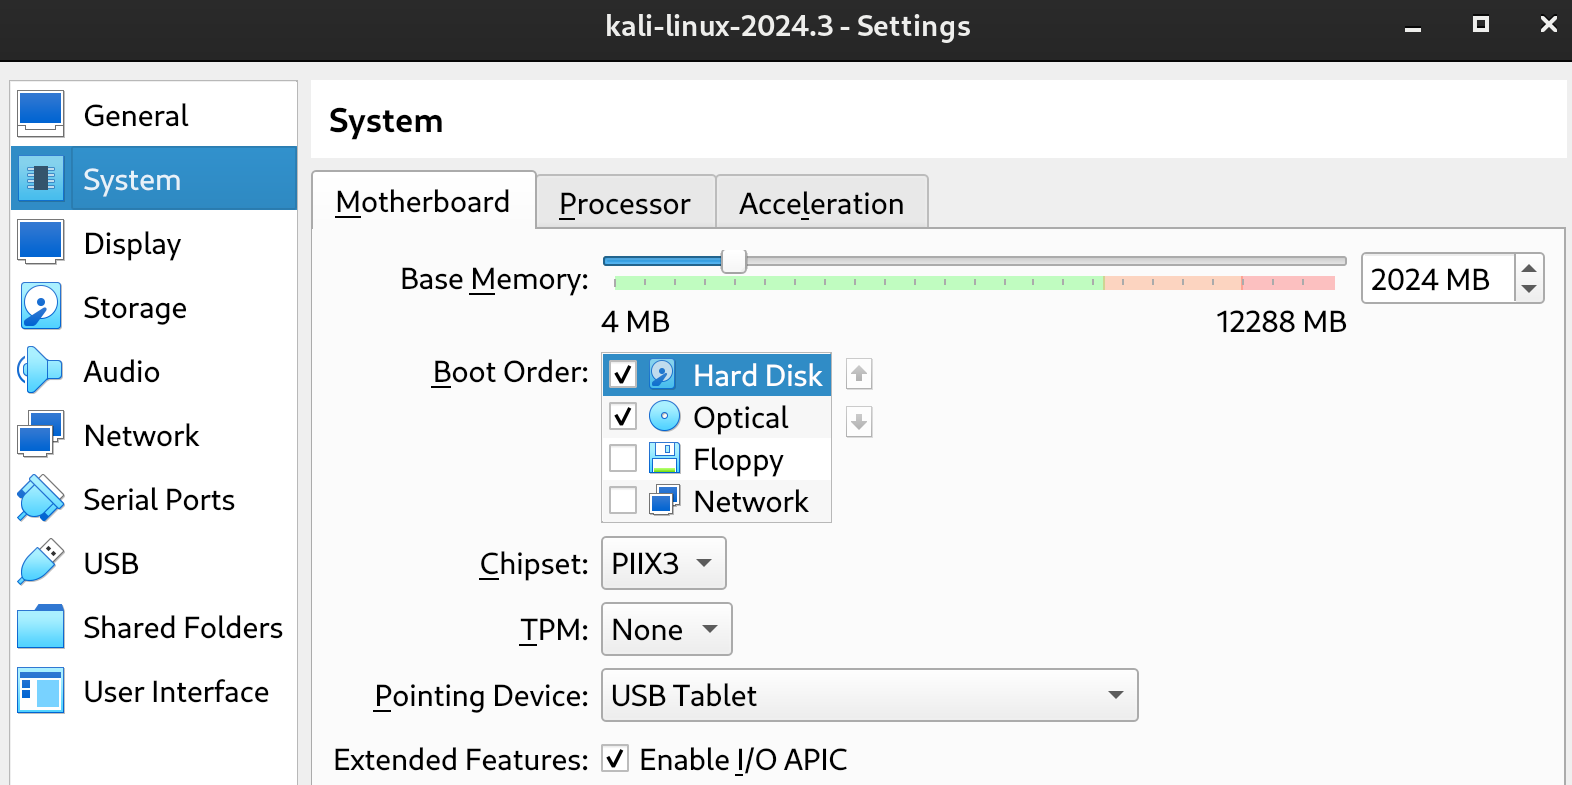
#### 1 - Kali Linux - Attacker Machine (optional)
Kali Linux - [VM (Virtual Box)](https://www.kali.org/get-kali/#kali-platforms)
* [Download](https://www.kali.org/get-kali/#kali-platforms)
* RAM 4GB | ROM 20GB
* Network NAT
#### 2 - Windows Server 2019 - Domain Controller (DC)
All Download Links versions:
* Old Version:
* Windows 2012 R2 Essentials:
* Windows 2012 R2:
* Windows 2016:
* Windows 2019 Essentials:
* Windows 2019:
* Windows 2022:
* Windows 2025:
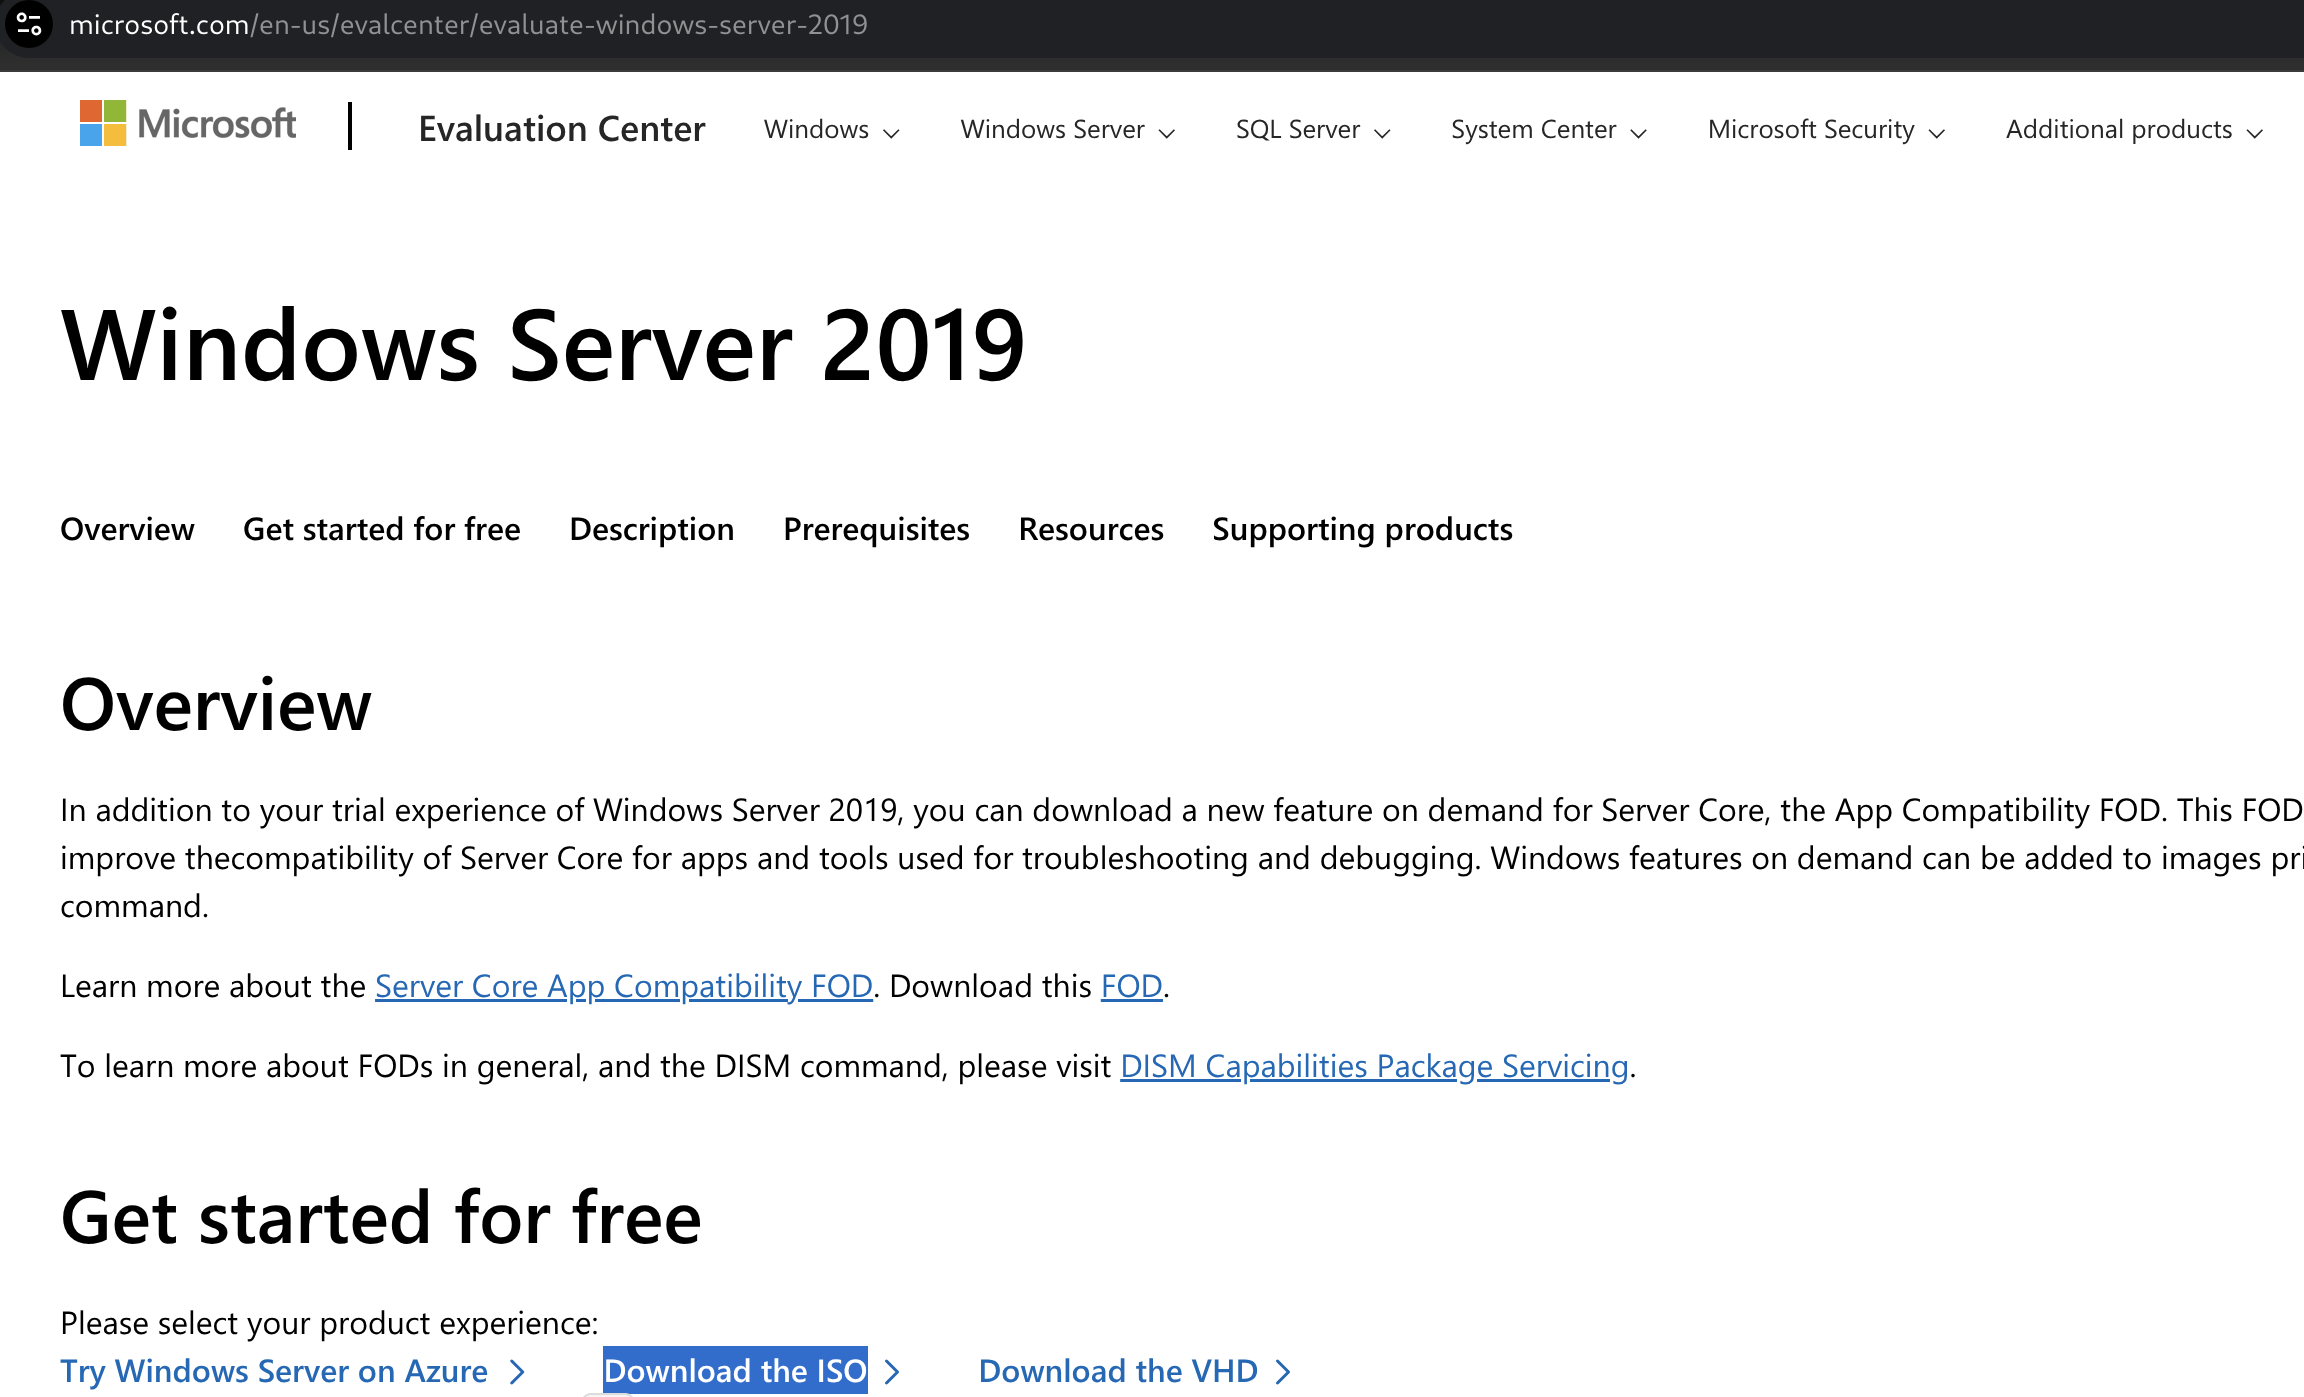
**Windows Server 2019:** This will act as our Domain Controller (DC).
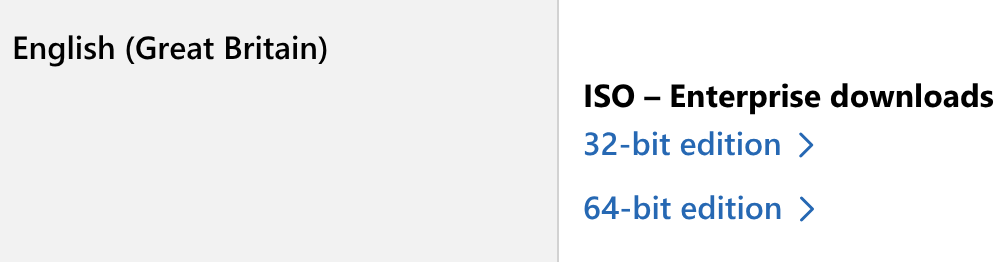
* Download: [Windows Server 2019 Evaluation](https://www.microsoft.com/en-us/evalcenter/evaluate-windows-server-2019)
Download language and architecture desidered (in my case x64/64bit and English), insert data in the form if required (Feel free to enter your data or not, there is no check on them)
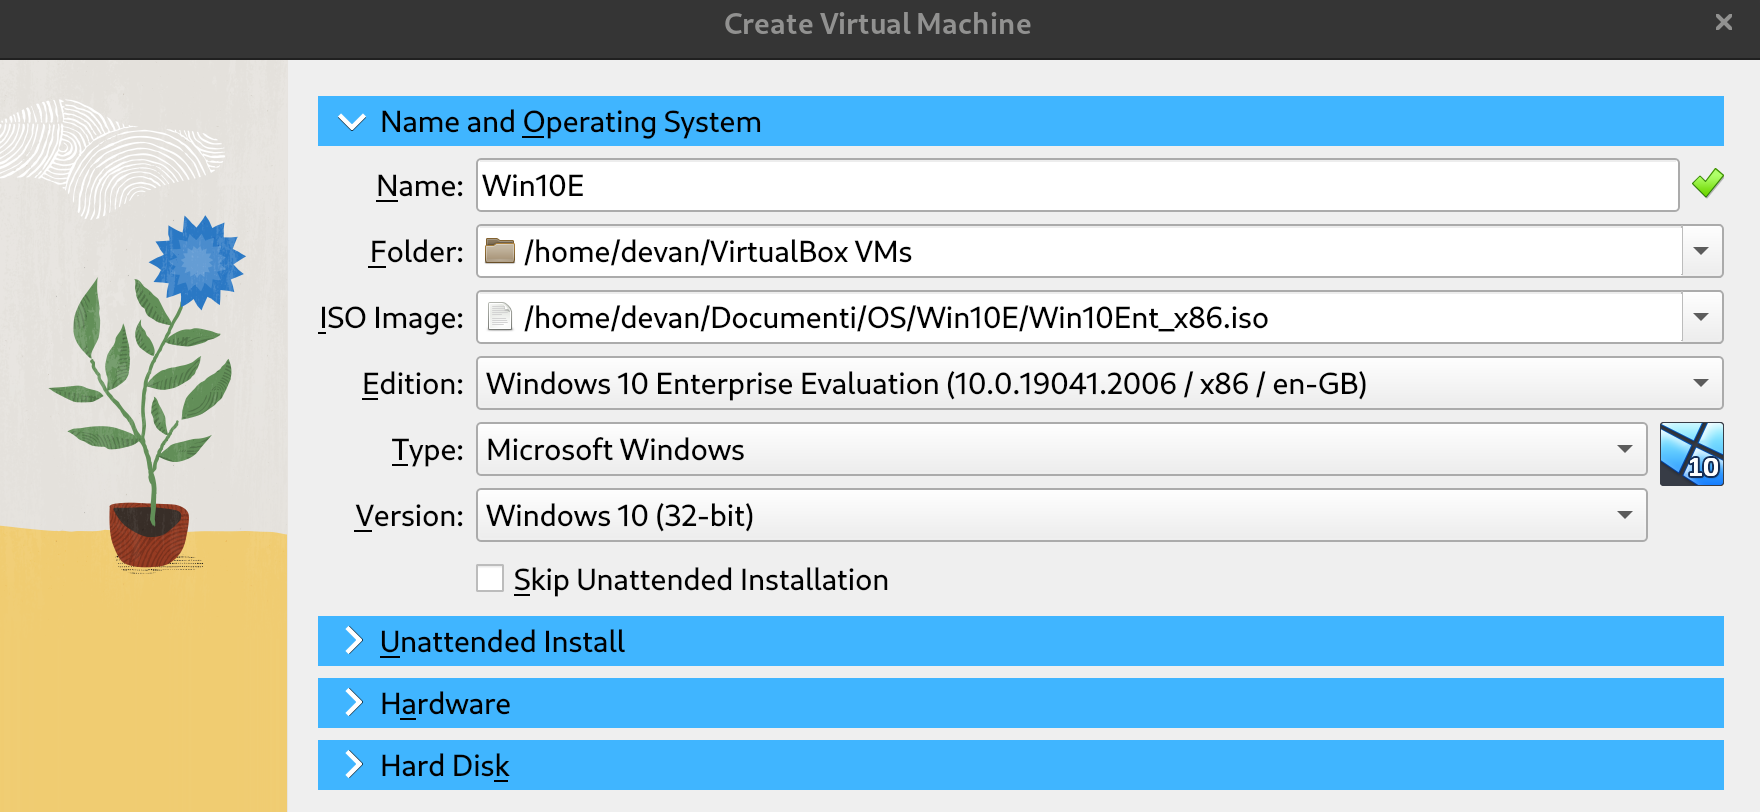
#### 3 - Windows 10 Enterprise - Host1 and Host2
**Windows 10 Enterprise:** This will serve as our client workstations
* Download: [Windows 10 Enterprise Evaluation](https://www.microsoft.com/en-us/evalcenter/evaluate-windows-10-enterprise)
Download language and architecture desidered, in this case i decided to download 32-bit edition because it is lighter and more aligned with the little RAM available, furthermore there will be two machines with Win10 E.
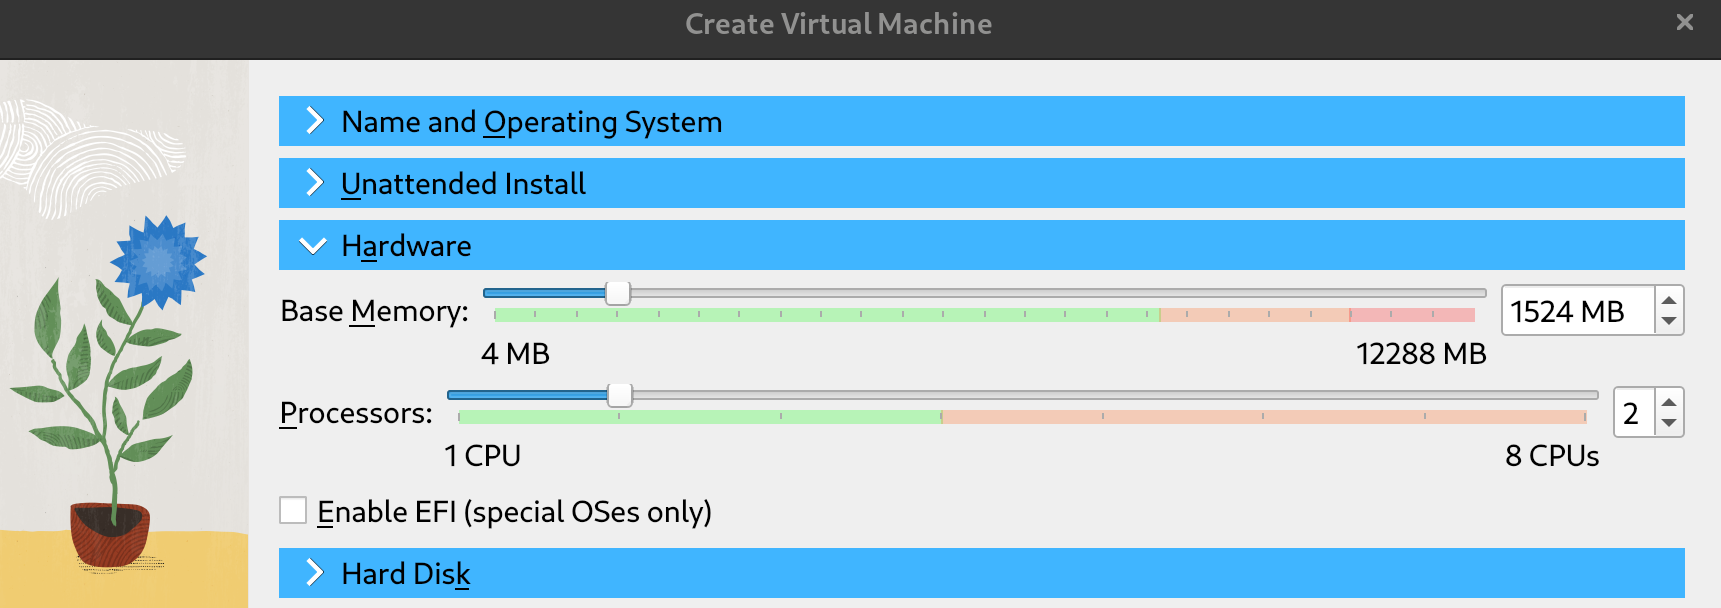
### My Configuration (Less than 10GB of RAM)
Having a somewhat dated PC, I was initially a bit discouraged by the creation of a large laboratory with several machines, but despite this, this configuration can be run on a PC with about 8\~10GB of RAM, even if the performance will not be at its best, but the desired result is acceptable.
Here's how I set up the various machines on the network:
**Strongly to remember: At least 3/4 GB of RAM must be free on the host machine**
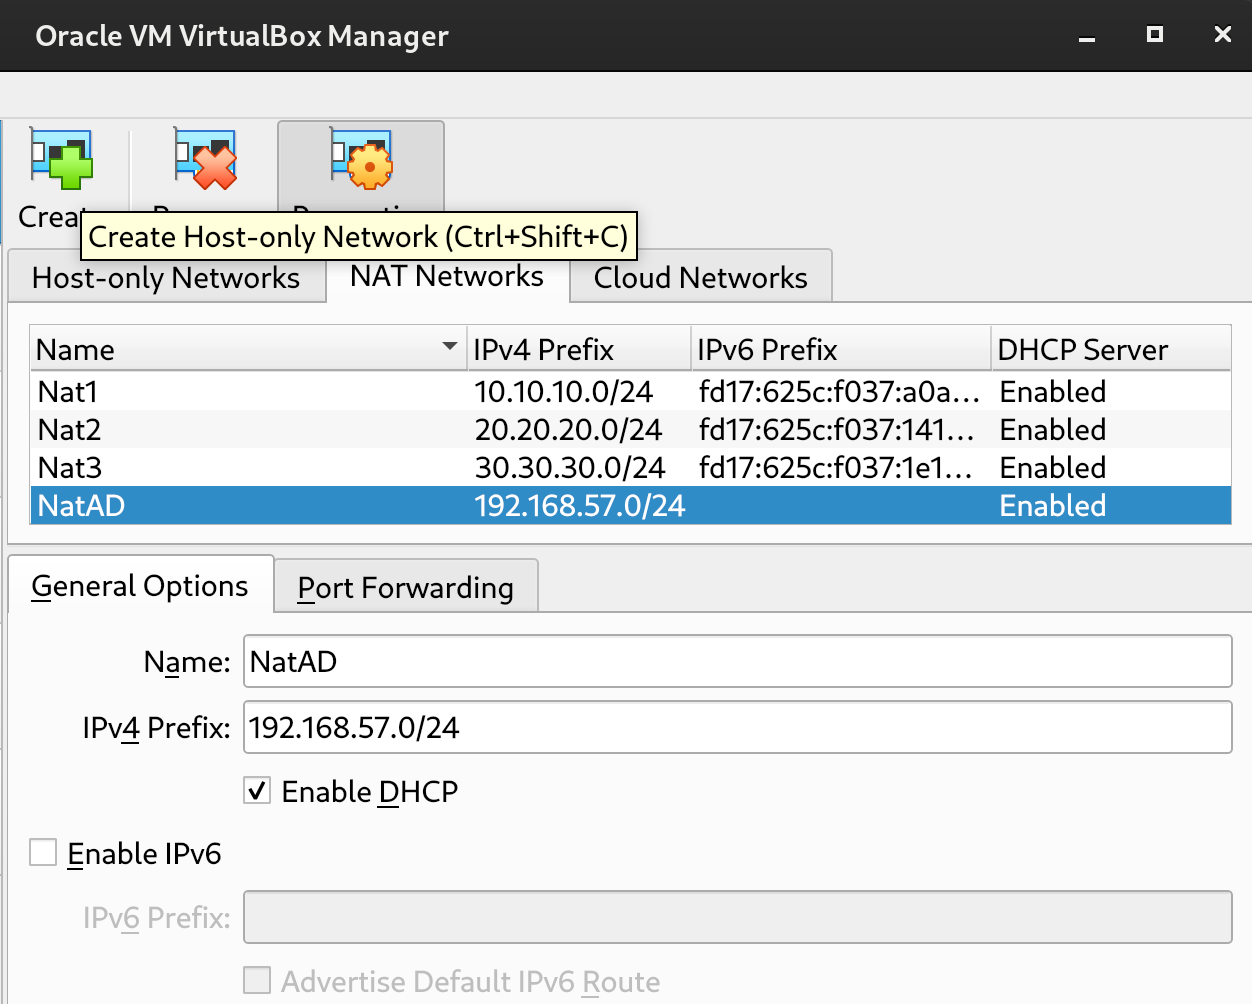
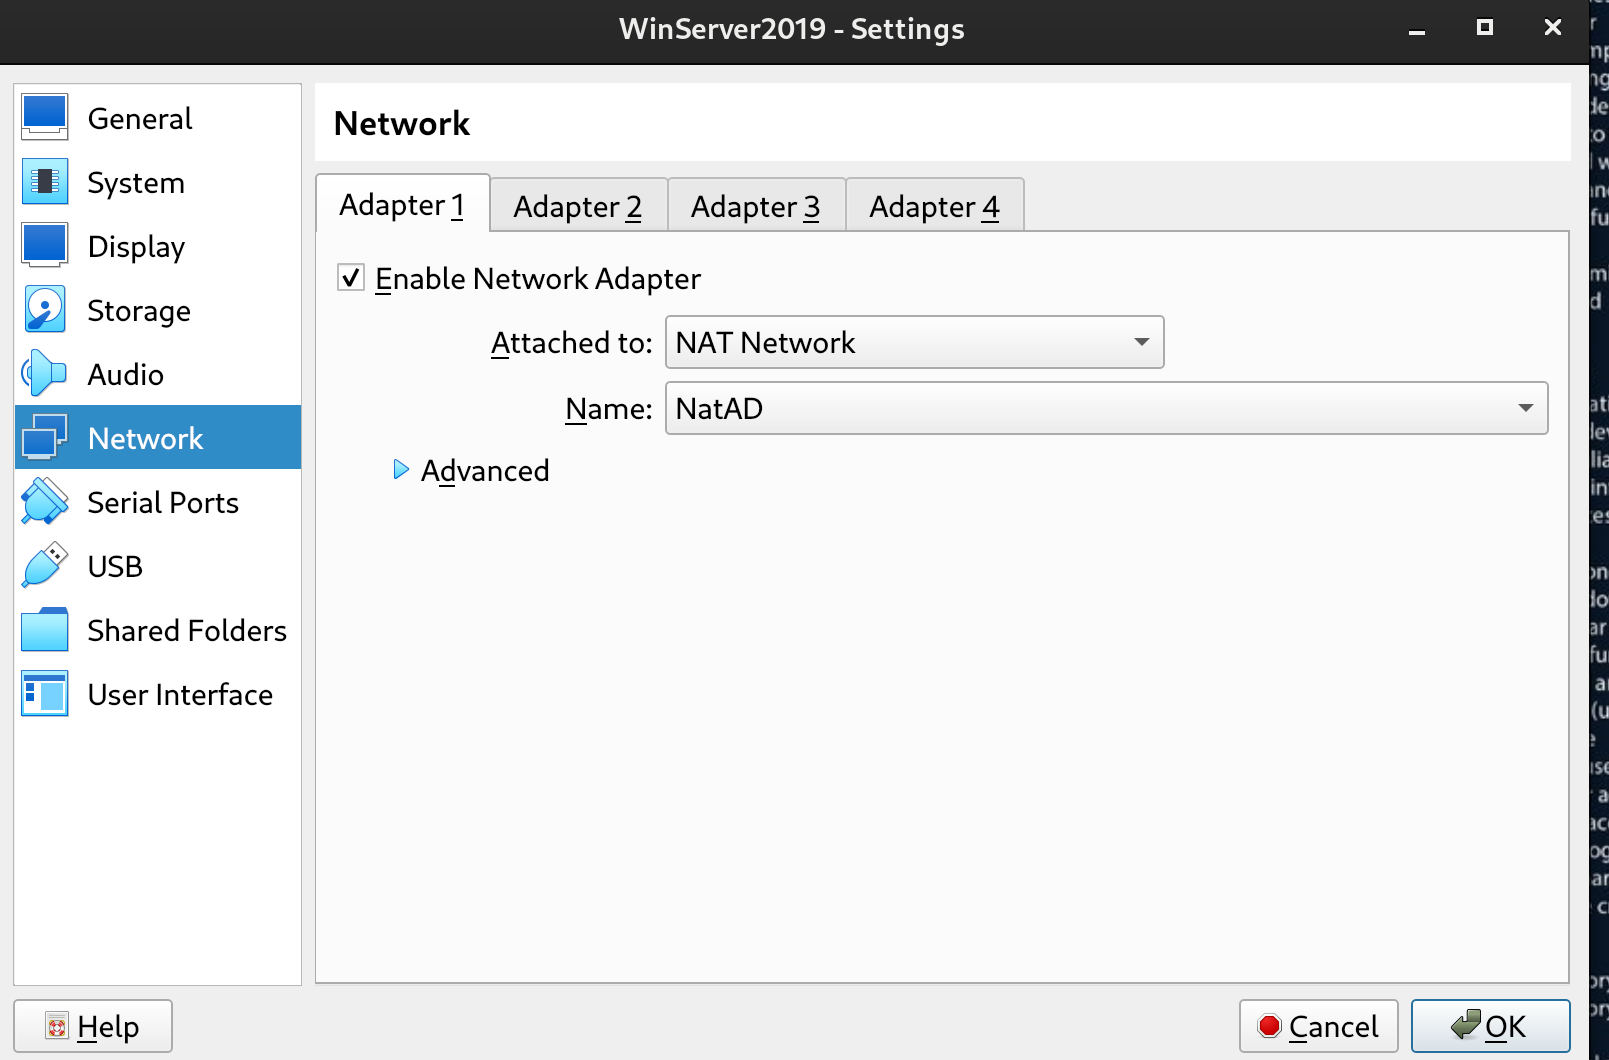
#### Create Nat Network
Tools -> Network -> Nat Network Details -> Enable Network -> { Name: NatAD CIDR: 192.168.57.0/24 Options: Supports DHCP }
We'll set this network interface on all machines
### 1 - Windows Server 2019 - Domain Controller (DC)
[Windows Server 2019 system requirements](https://learn.microsoft.com/en-us/windows-server/get-started/hardware-requirements?tabs=ram\&pivots=windows-server-2019)
Minimum requirements: RAM 2GB | ROM 40GB
Before starting the VM (if it starts automatically, close it) remove the reference to the floppy: right click + remove or del:
and set the nertwork interface to NAT Network -> NatAD
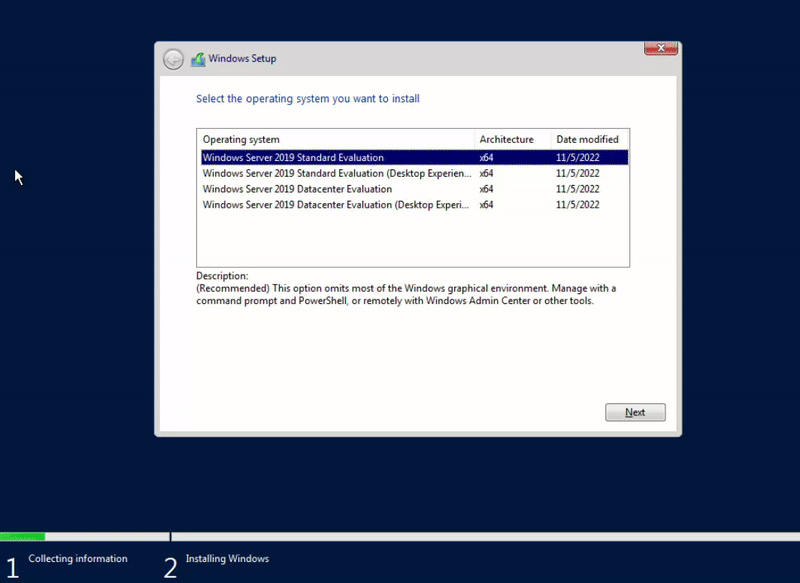
Start the VM
Select: Windows Server 2019 Standard Evaluation (Desktop Experience) - **the 2nd option**
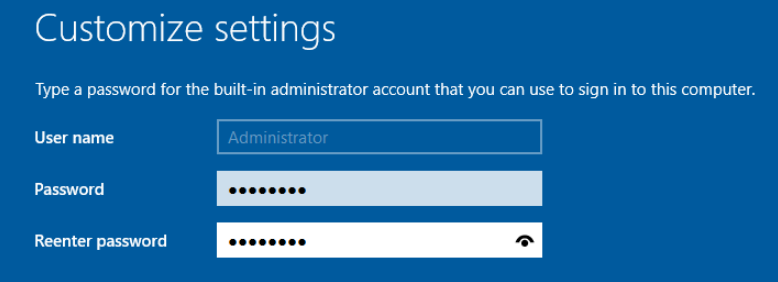
I'm using this psw (more common in THM labs): P@$$W0rd
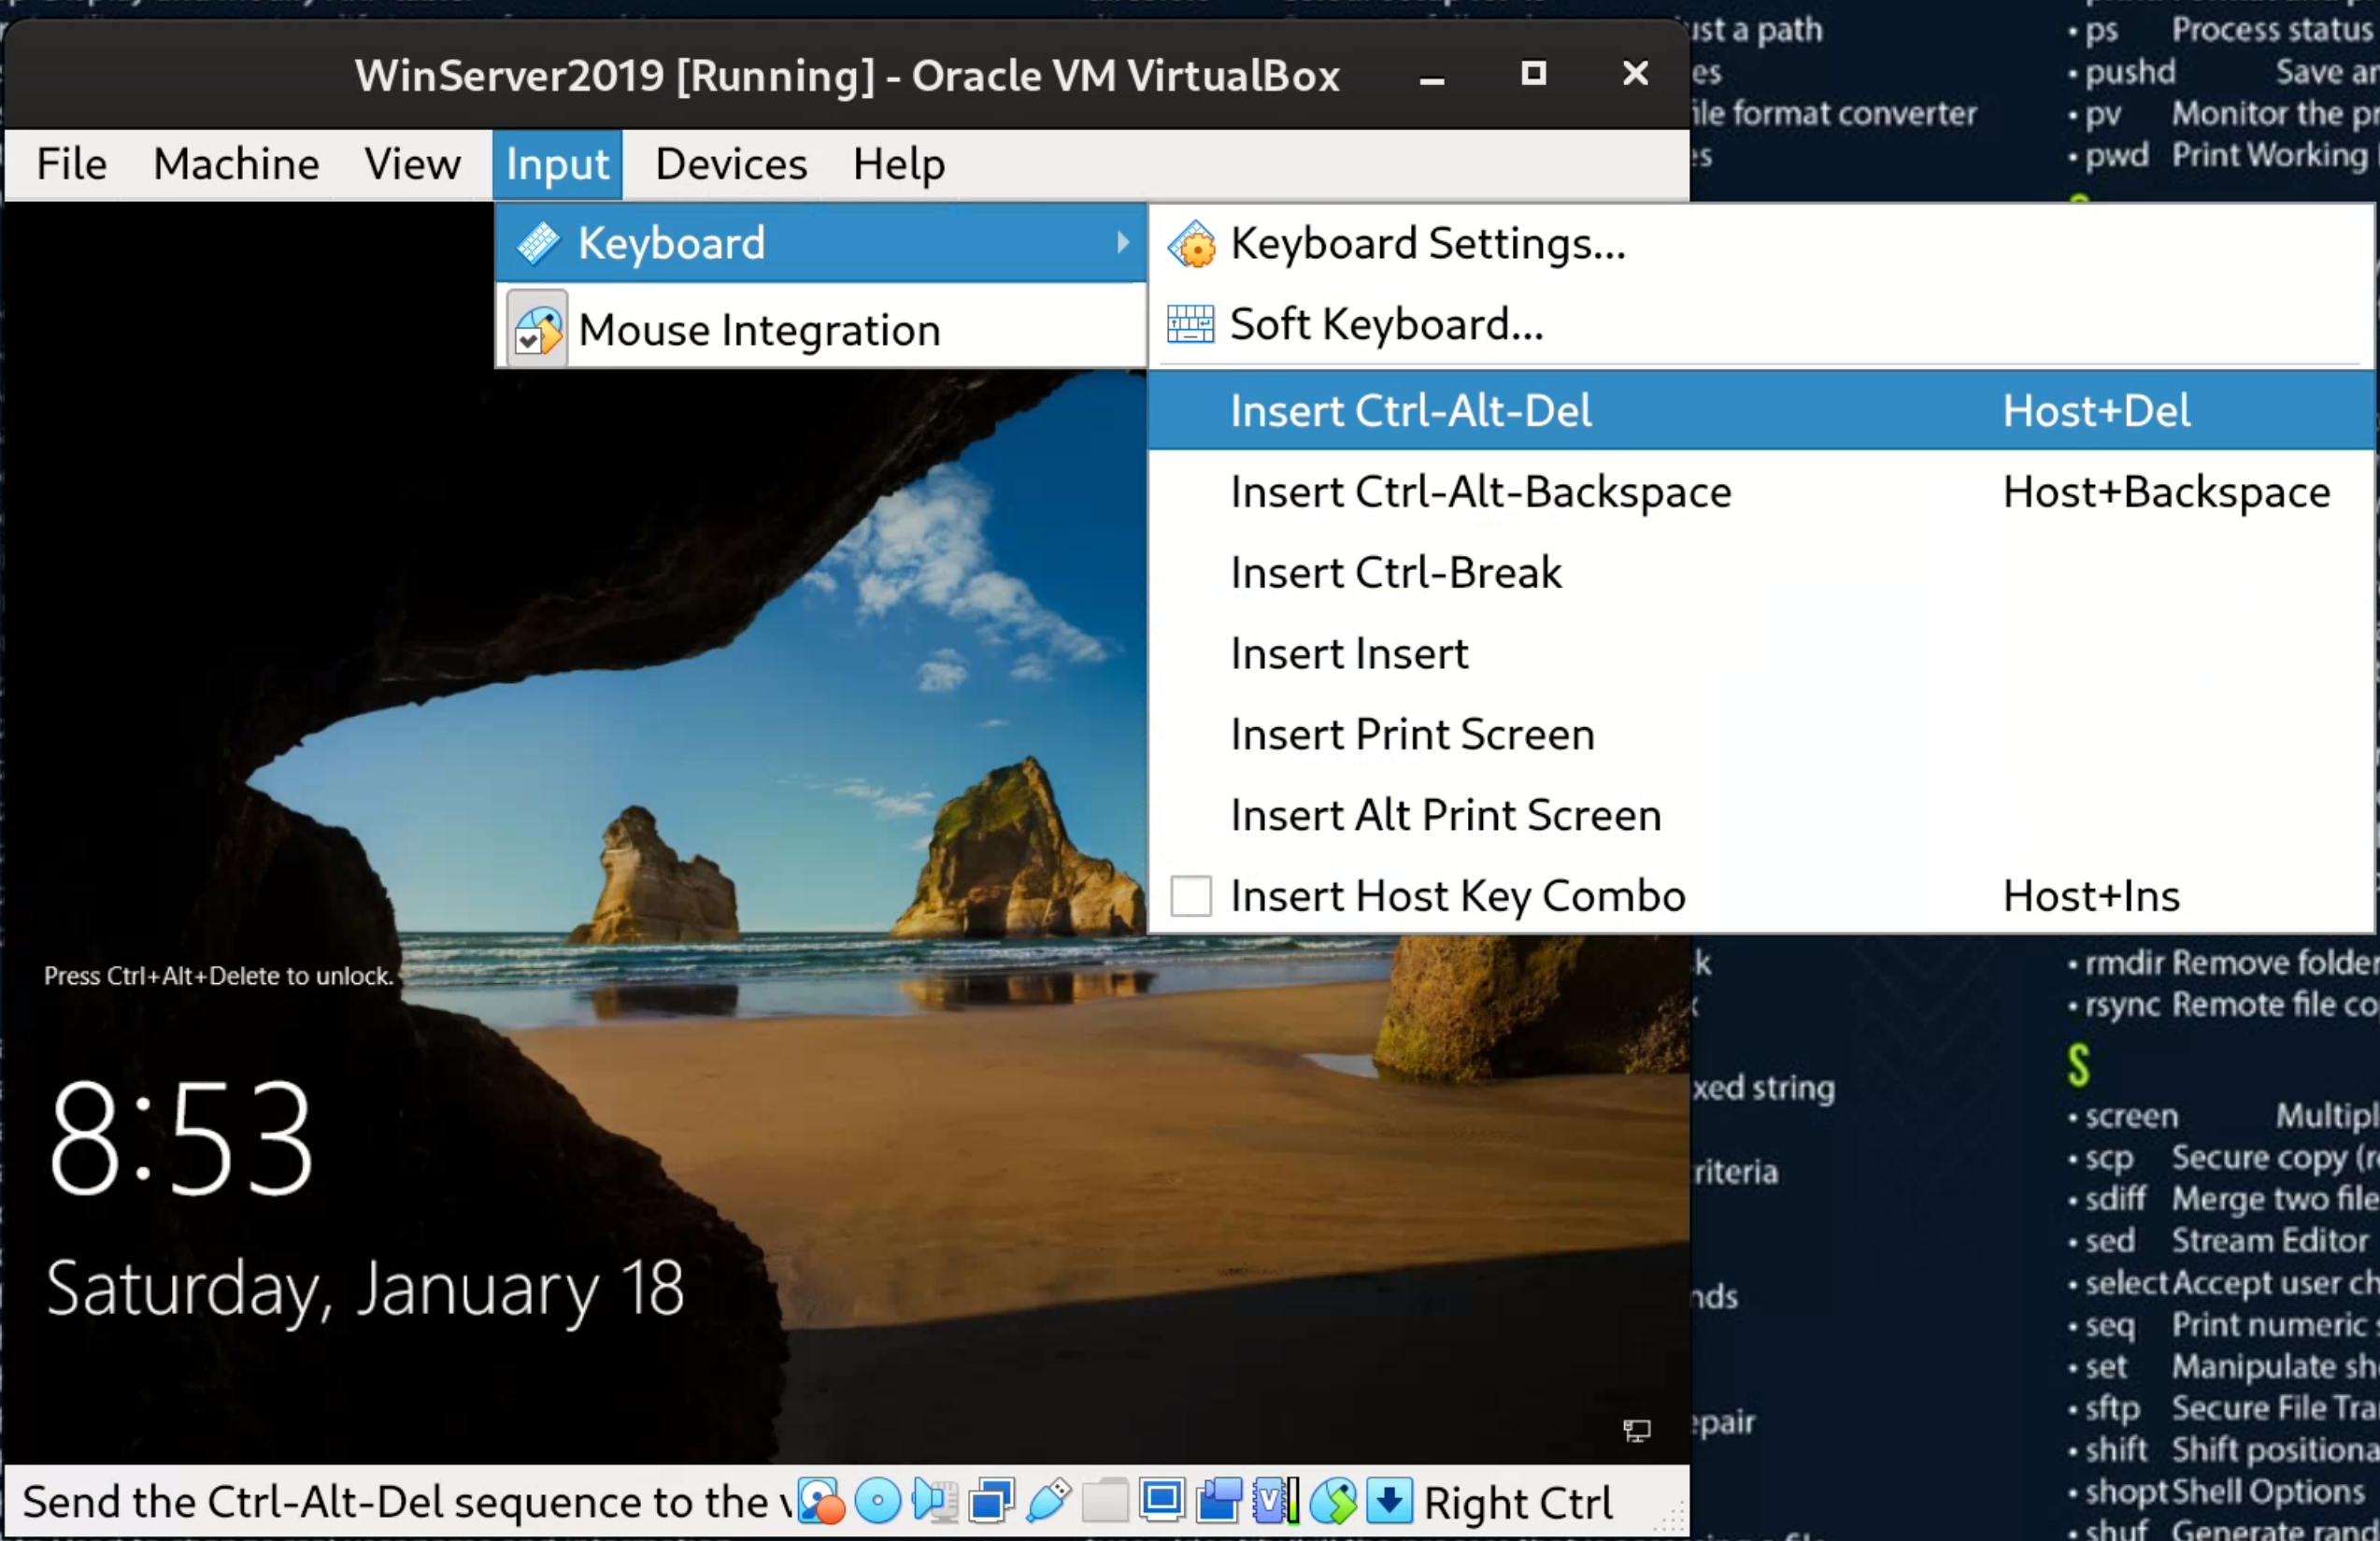
To unlock it you need to use Host (CTRL on the right) + DEL
Rename machine name 'CORP-DC' (optional): Settings -> About -> Next -> Restart
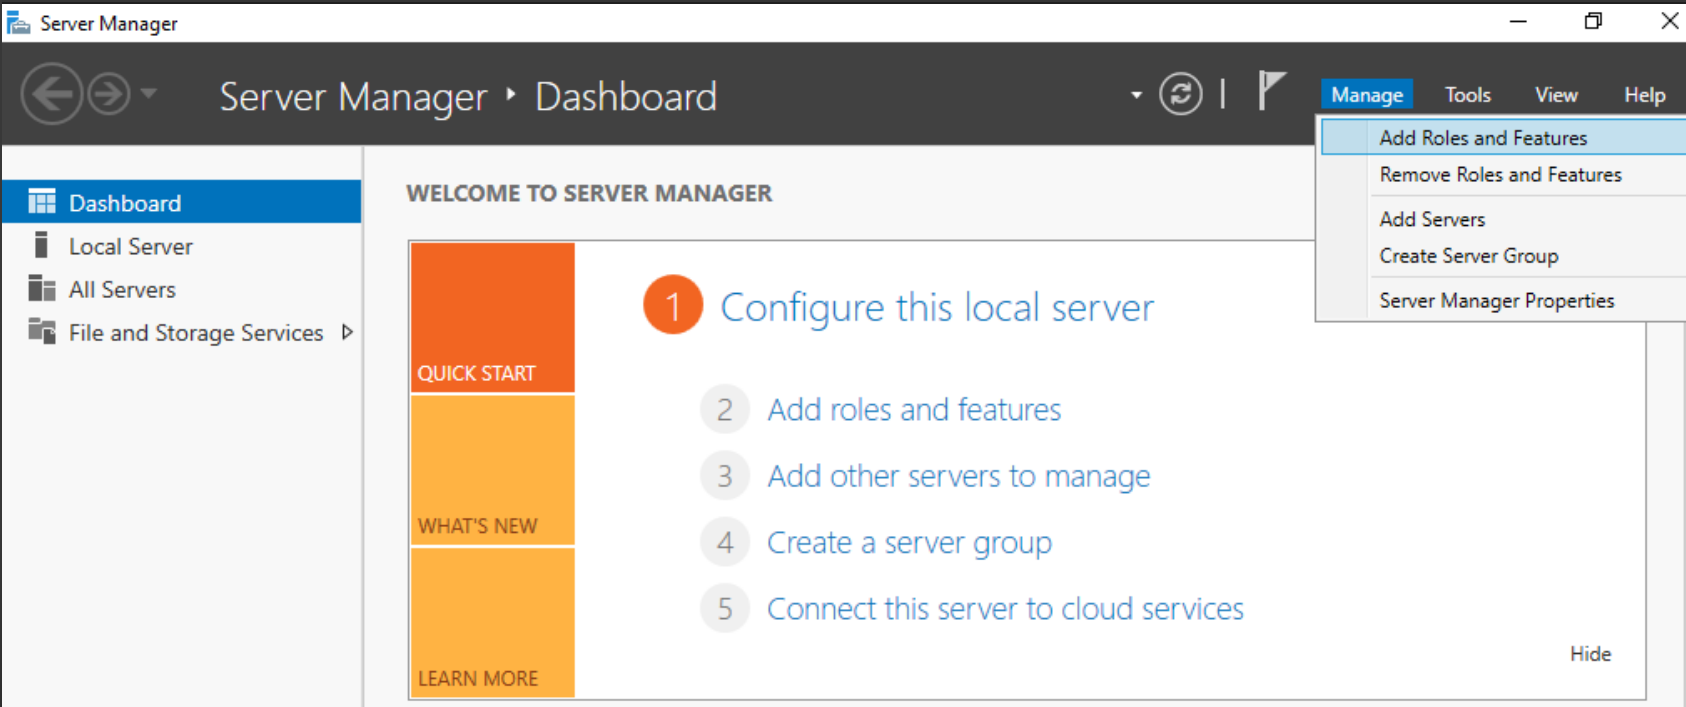
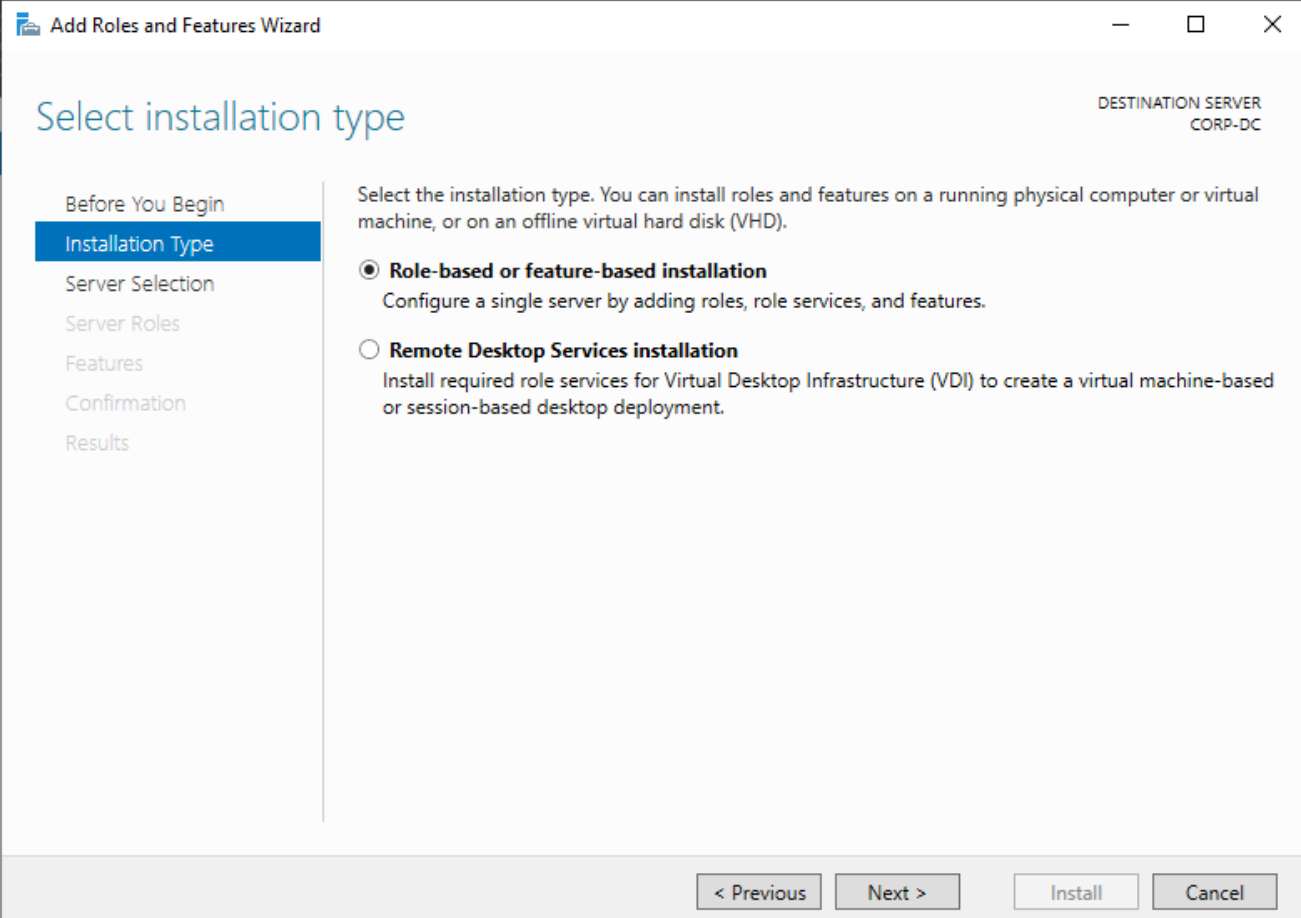
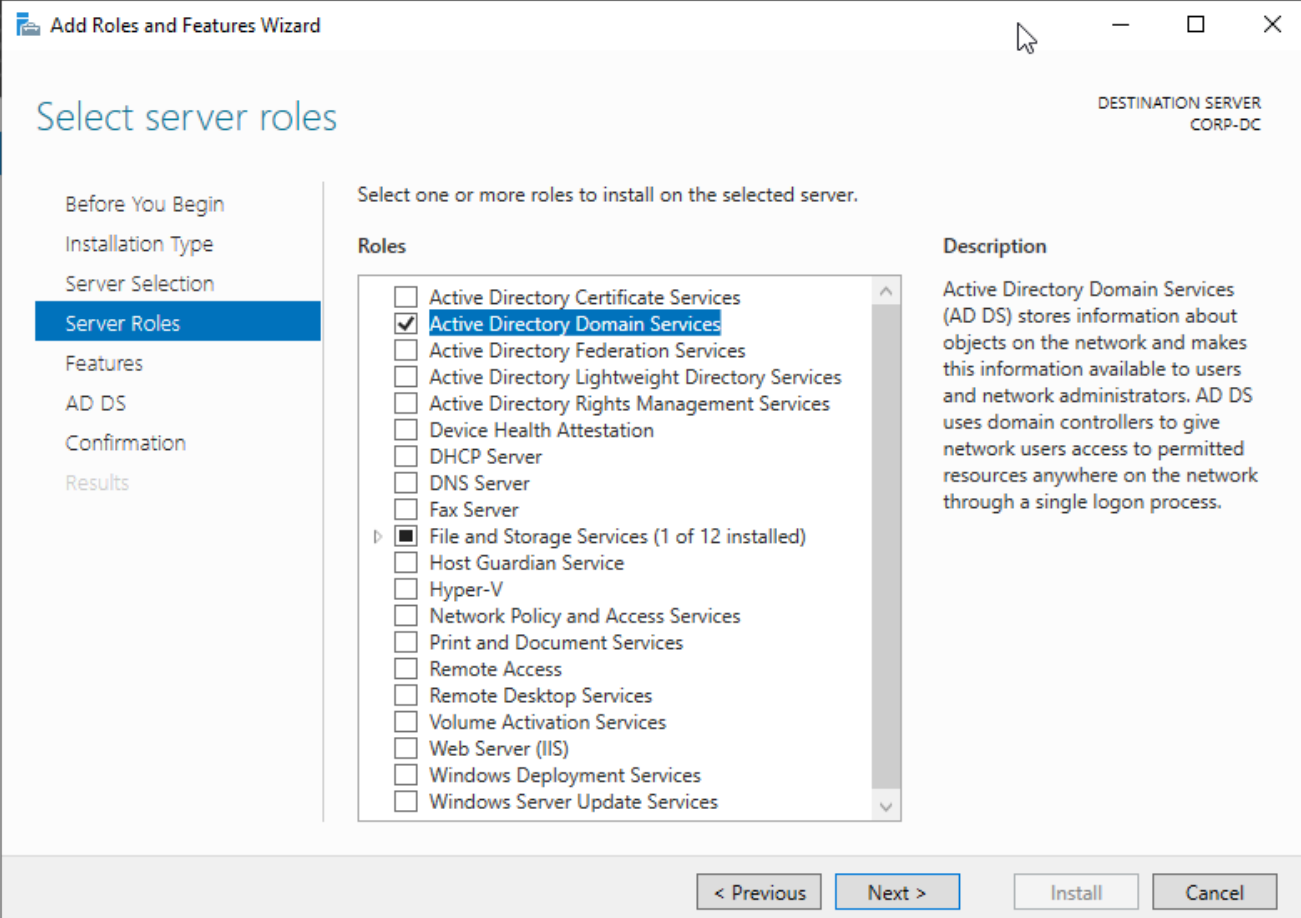
Now, we need to add roles and features, go to: Manage -> Add Roles and Features
Check the 2nd value "Active Directory Domain Services"
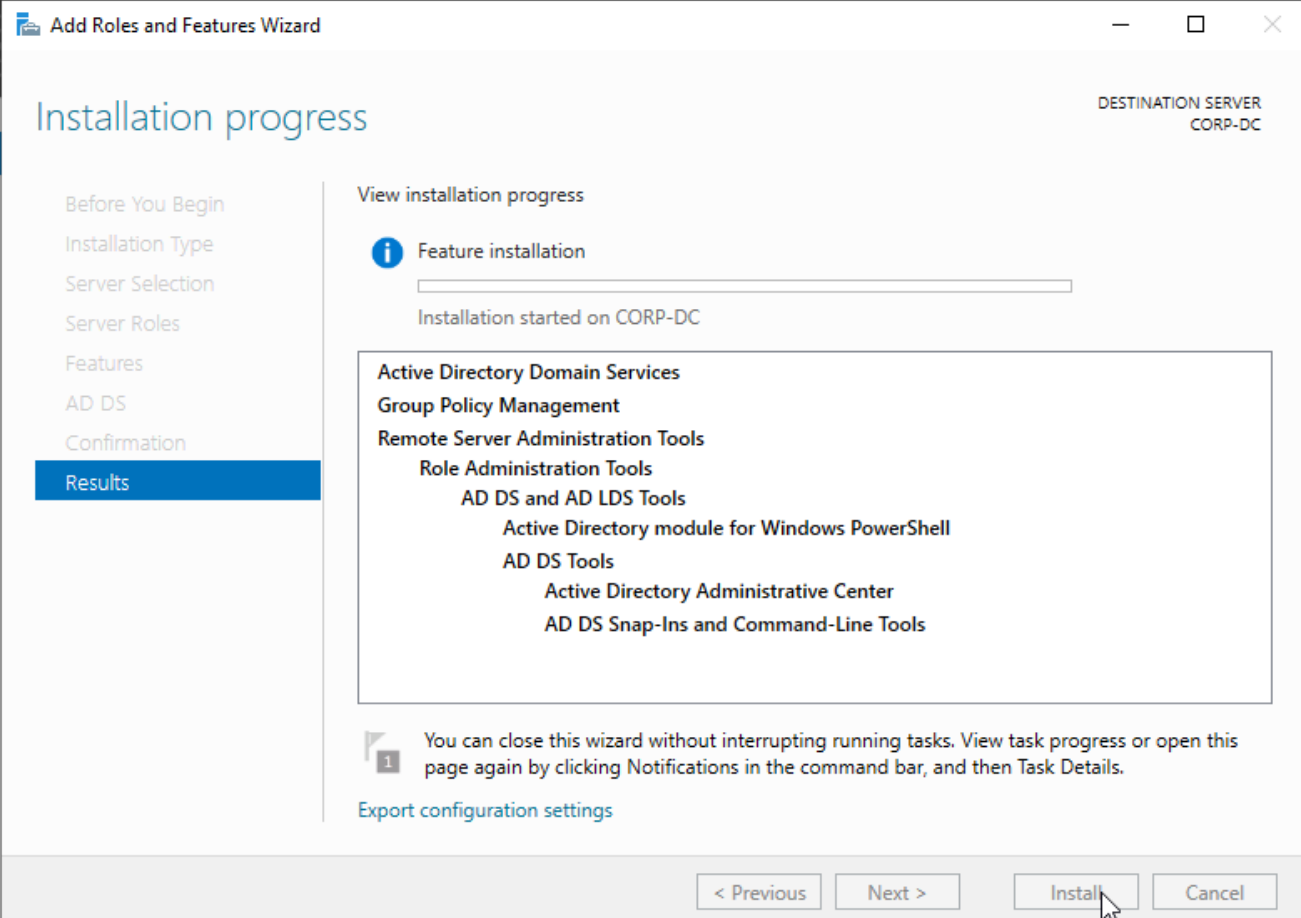
Next, next, install:
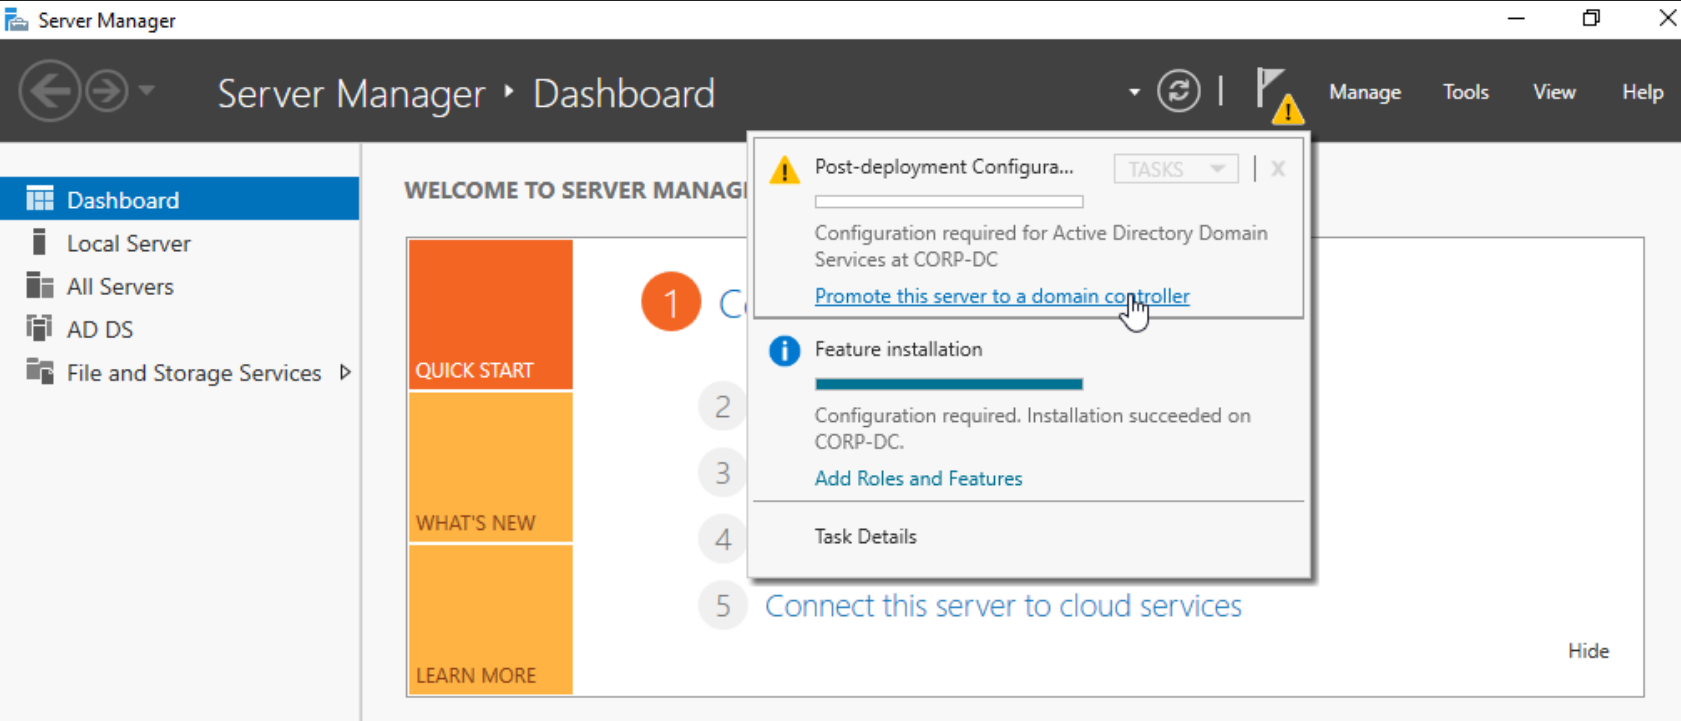
Now, click on the flag and "Promote this server to a DC"
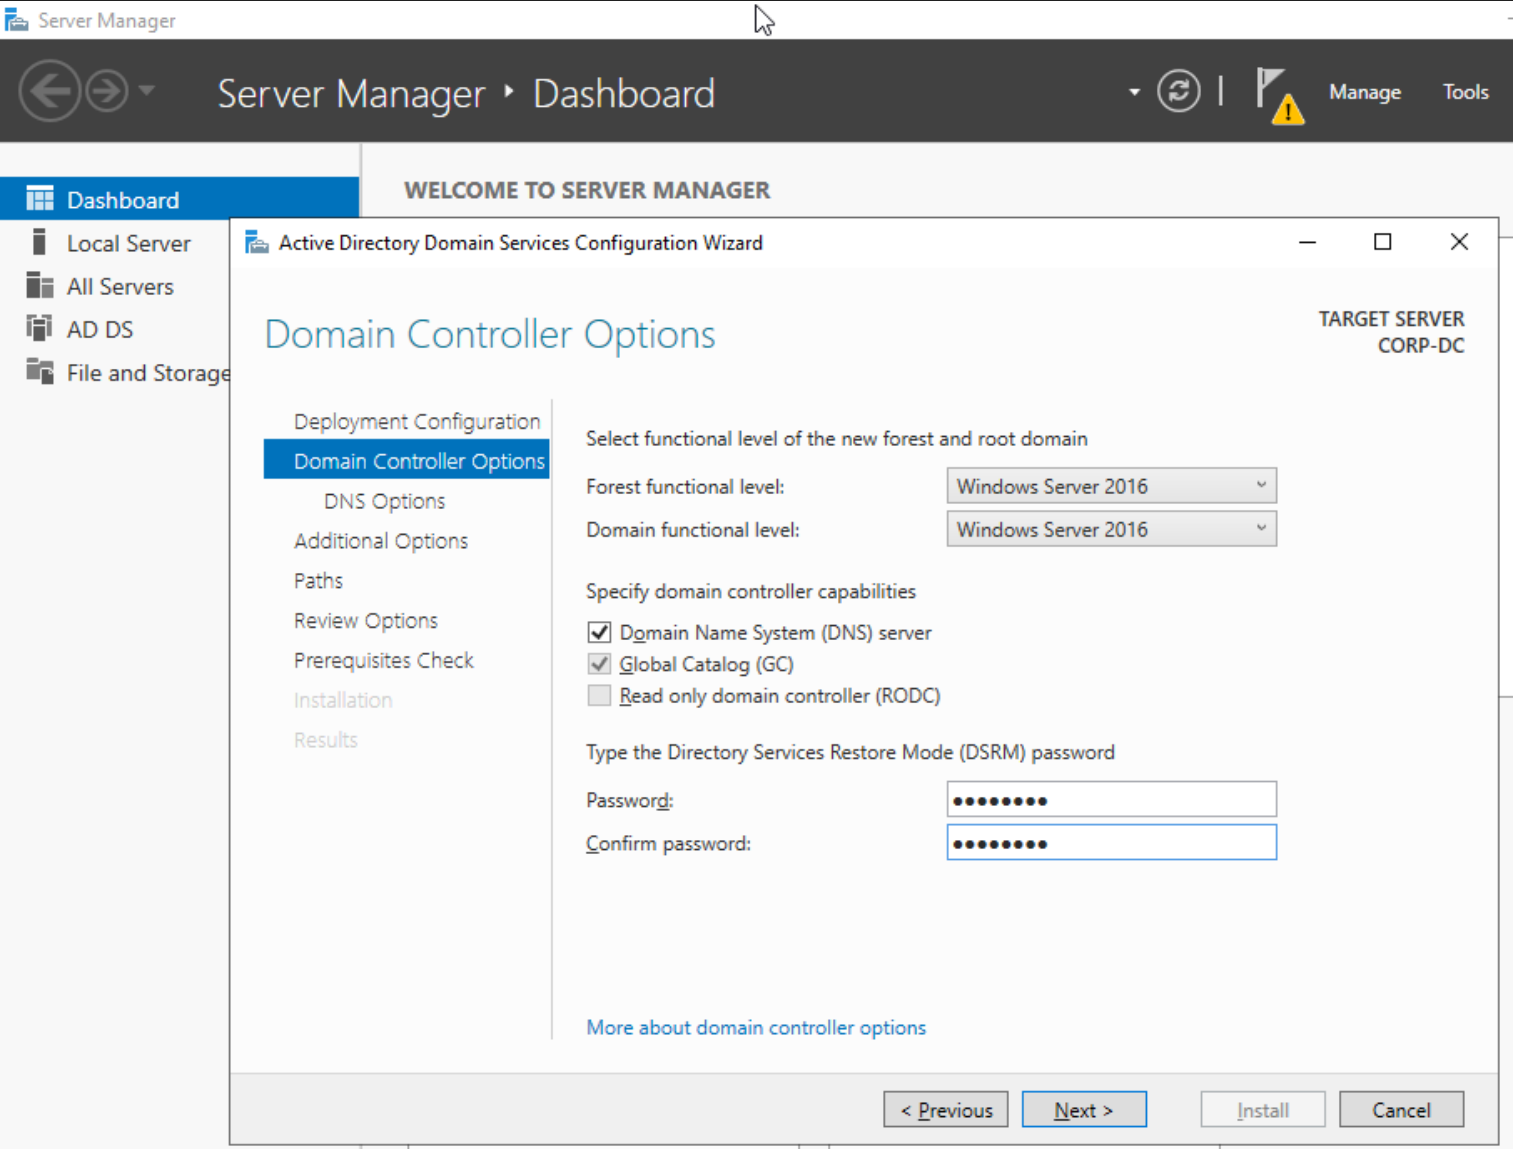
Add a new forest: dev-angelist.lab
Insert a psw: P@$$W0rd
Next (no/unchecked create dns delegation), next, next, next, next, install.
After that we'll automatically sign-out and machine will restart (if this does not happen, you can do it manually).
#### Add New GPO called "Dev-angelist Lab Policy"
Open Run (WIN+R) and type: gpmc.msc
Click to: Create a GPO in this domain, and Link it here...
Edit our new GPO:
#### Disable Windows Updates
Go to: Computer Configuration -> Policies -> Administrative Templates Policy definitions -> Windows Components -> Windows Update
Double click on "Configure Automatic Updates" -> Disabled -> Apply -> OK
#### Disable Antivirus
Continuing disabling Realtime Protection on Antivirus:
Go to: Computer Configuration -> Policies -> Administrative Templates Policy definitions -> Windows Components -> Windows Defender Antivirus -> Real-time Protection.
Double click on "Turn off real-time protection" -> Enabled -> Apply -> OK
(Enabled because the phrase is a negation)
#### Update GPO
Now, open command prompt (cmd) and type: `gpupdate /force`
to force GPO updates
### Create new AD users
Open powershell
and create a new user with this credentials: devan::P\@ssword123!
```powershell
New-ADUser -Name "devan" -SamAccountName "devan" -UserPrincipalName "devan@dev-angelist.lab" -ACcountPassword (ConvertTo-SecureString -AsPlainText "P@ssword123!" -Force) -Enabled $true
```
#### Enable user
```powershell
Enable-ADAccount -Identity "devan"
```
#### Make the new user a service account
```powershell
Set-ADUser -Identity devan -ServicePrincipalNames @{Add="HTTP/webserver.dev-angelist.lab"}
```
and verify that it was created using:
```powershell
Get-ADUser -Identity devan -Properties ServicePrincipalNames
```
***
### 2 - Windows 10 Enterprise - Host1 (32bit)
[Windows 10 system requirements](https://support.microsoft.com/en-us/windows/windows-10-system-requirements-6d4e9a79-66bf-7950-467c-795cf0386715)
Minimum requirements: RAM 1.5GB | ROM 22GB
Before starting the VM (if it starts automatically, close it) remove the reference to the floppy: right click + remove or del, and set the nertwork interface to NAT Network -> NatAD
Start the VM to do initial installation, the process is more similar to the WinServer Machine, then i'll add only the different things:
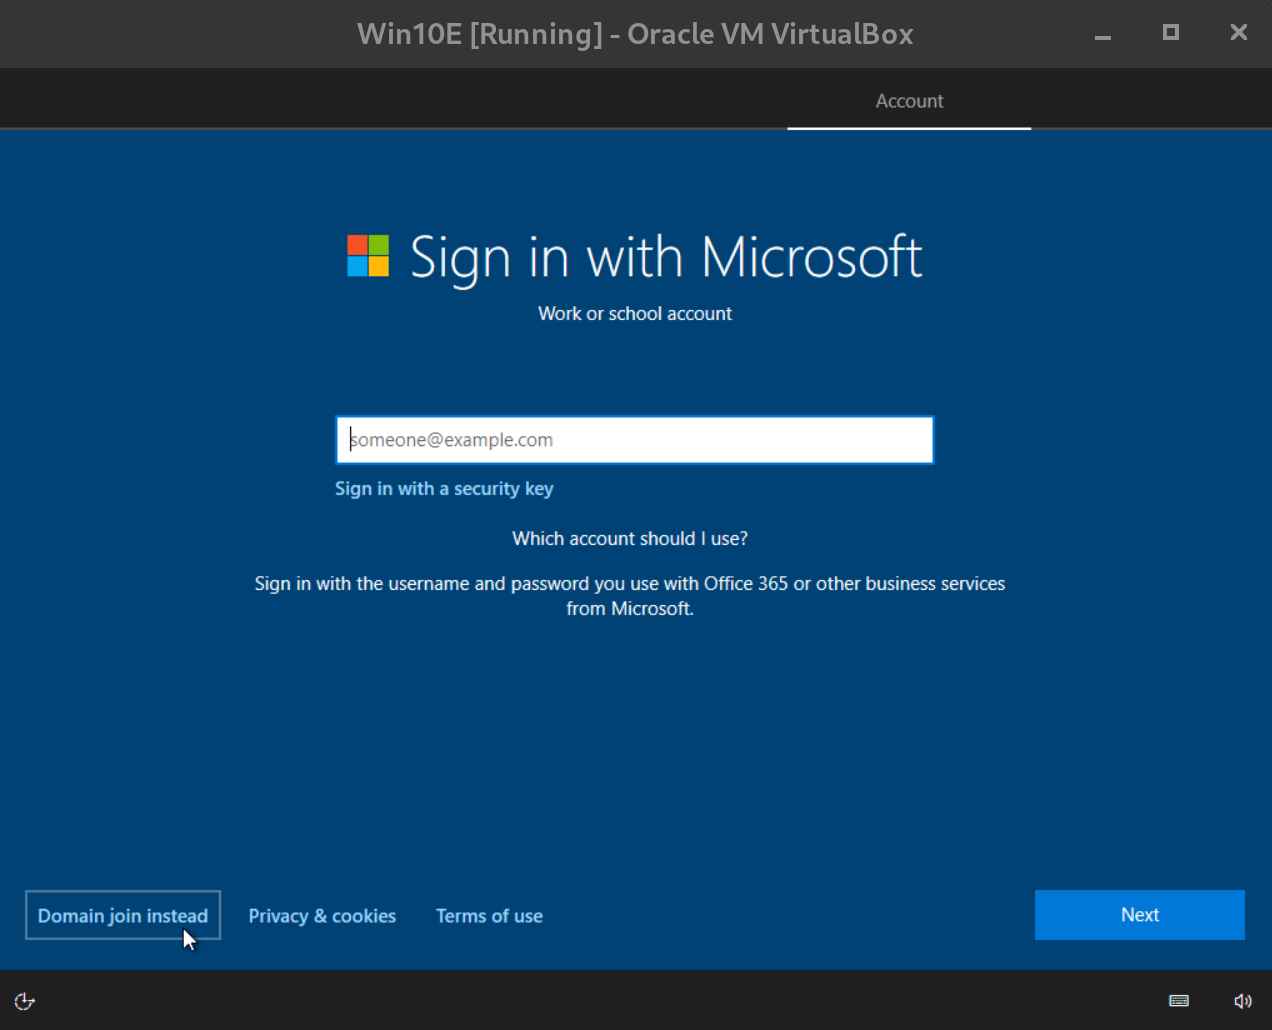
Click on Domain join instaed
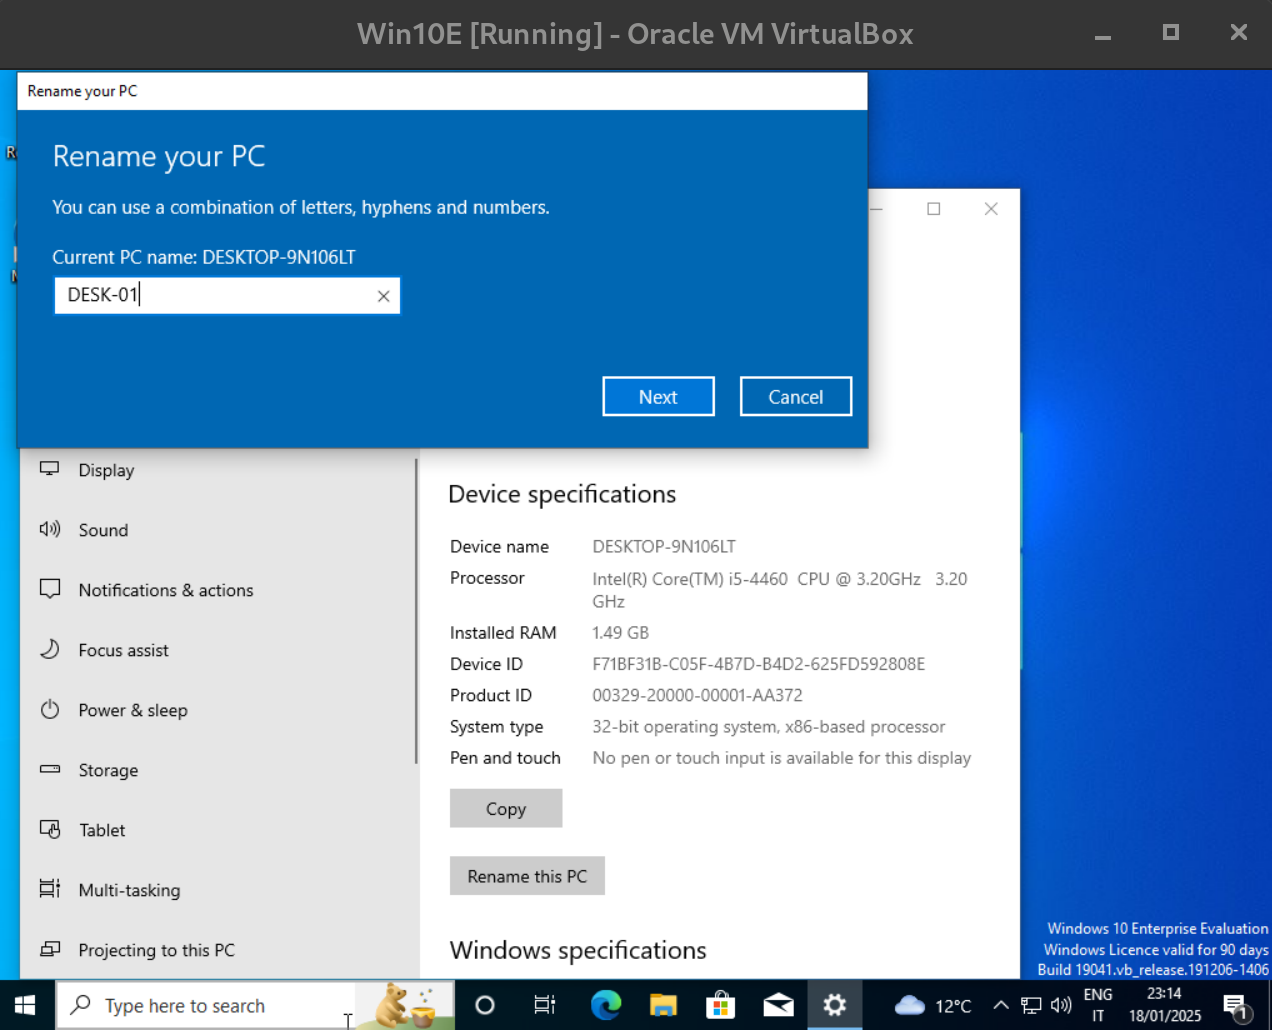
Add a name (MS-01) and psw (P@$$W0rd123):
Add three casual security questions/answers for the account (mandatory), deactivate location function, diagnostic data sending and Cortana.
Now we're in, and If you want you can rename the machine: DESK-01 and restart.
#### Join Workstation to Domain
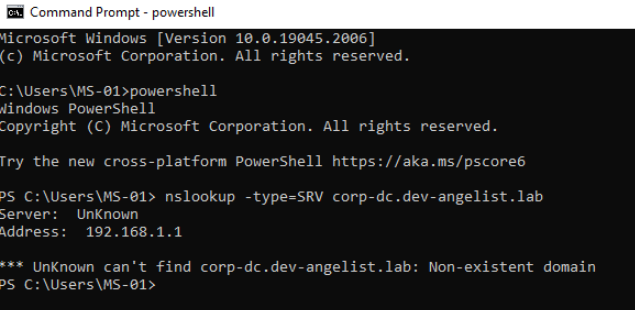
#### Configure DNS
Trying to resolve Domain Controller (corp-dc) DNS we can't obtain it:
so, we need to configure it now changing the network configuration
this is the IP of Domain Controller machine `192.168.57.9`:
on DC machine
To change the DNS we need to opern network configuration interface using:
Open Run (WIN+R), type: ncpa.cpl
Now select network interface of interest -> properties -> configure IPv4 settings -> set DNS server to the AD DNS (192.168.57.9) and the default gateway as alternative DNS (192.168.57.1).
Trying again to resolve the DC DNS we can see that's correct now!
Now we can join the workstation to the domain.
The last step is to insert the user credential of user who has the required permissions, such as a domain admin account: 'Administrator'
Then go to: Control Panel -> System and Security -> System -> Advanced system settings -> Computer Name -> Change -> Domain -> "dev-angelist.lab"
We can verify it on DC machine using: `net user /domain`
Well done!
Now we can add on the Workstation machine with the devan account: dev-angelist\devan::P\@ssword123! or ::P\@ssword123!
To create new users we can follow again the step: "Create new AD users".
### 3 - Kali Linux - Attacker Machine
Minimum requirements: RAM 2GB | ROM 40GB
This is the attacker machine, than it's needed/suggested only for AD exploitation.
In this case the process is more quick, because this is a specific version for [VM/Oracle](https://www.kali.org/get-kali/#kali-virtual-machines)
[Download Kali Linux VM vs (ova)](https://www.kali.org/get-kali/#kali-virtual-machines)
The machine name is: 'Kali' and before to start it, it's necessary to remove the reference to the floppy: right click + remove or del, and set the nertwork interface to NAT Network -> NatAD
## Troubleshooting
### **Time Synchronization Issues**
🔍 **Issue:**
* Kerberos authentication fails if there is a time difference >5 minutes.
* The workstation is using an incorrect NTP source.
✅ **Solution:**
* Sync the time manually on the client:
```powershell
w32tm /resync
```
* Check the DC’s time source:
```powershell
pw32tm /query /source
```
* Set the client to sync with the DC:
```powershell
w32tm /config /syncfromflags:domhier /update
net stop w32time && net start w32time
```
### **User Not a Member of Required Groups**
🔍 **Issue:**
* The user is not part of “Domain Users” or another group required for login.
* The account is missing required privileges for network authentication.
✅ **Solution:**
* Check user’s group membership:
```powershell
Get-ADUser -Identity -Properties MemberOf
```
* If missing, add to **Domain Users**:
```powershell
Add-ADGroupMember -Identity "Domain Users" -Members
```
### **Domain Trust or DNS Resolution Issues**
🔍 **Issue:**
* The workstation cannot find the Domain Controller.
* `nltest /dsgetdc:` fails or returns an incorrect DC.
✅ **Solution:**
* Check domain resolution:
```powershell
nslookup dev-angelist.lab
```
* If the workstation is pointing to the wrong DNS, set it to use the DC’s IP:
```
Control Panel → Network and Sharing Center → Adapter Settings → Set DNS to DC IP
```
* Force domain discovery:
```powershell
nltest /dsgetdc:dev-angelist.lab
```
### **Account Locked Out**
🔍 **Issue:**
* Multiple failed login attempts locked the account.
* The account is locked out in AD.
✅ **Solution:**
* Check if the account is locked:
```powershell
Get-ADUser -Identity -Properties LockedOut
```
* Unlock the account:
```powershell
Unlock-ADAccount -Identity
```
## Lab Pre-Configured
* [Game Of Active Directory (GOAD)](https://github.com/Orange-Cyberdefense/GOAD) - more than 16 RAM needed